Window Decoration
Dark winter mornings and evenings are an opportunity for experimenting with fancy lighting (optionally using festivities as an excuse). This year, I built an illuminated decoration to fit our house's faux leaded windows.
My phone does a poor job of capturing the display in-situ (centre photograph). The photo on the left gives an impression how it looks in person. On the right is an animated rendering of some of the animations the display shows.
Light box design
The basic idea for the decoration was to build an array of 5" wide by 4" tall triangular light boxes to match the windows. (Ugh, inches).
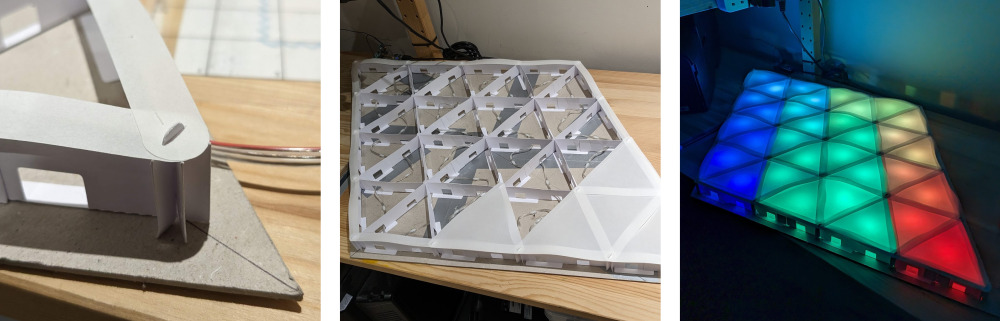
I quickly ruled out 3D printing the light boxes because of their (large) size. Instead I turned to my trusty plotter for a paper and cardboard construction. After a false-start on an (excessively fiddly to assemble) 'modular' design (left) I eventually went for a trellis of interlocking strips (right).
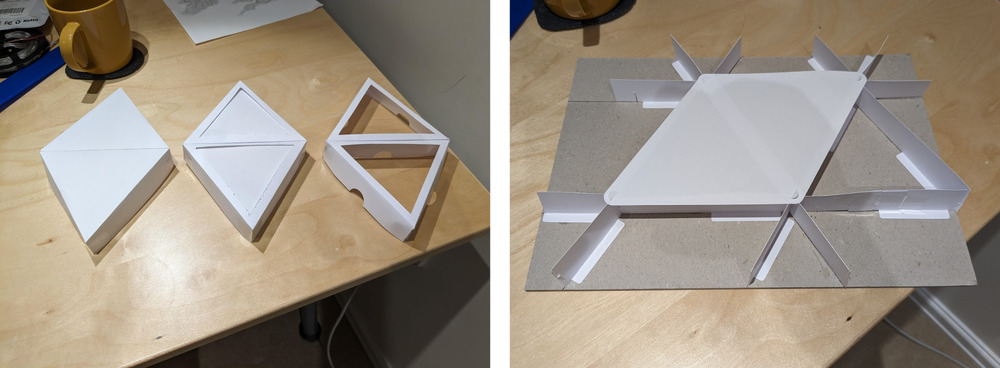
There's rather more to the design of the interlocking strips than meets the eye. First, since there are three strips to interlock, that's three different designs. You also need to ensure the slots are wide enough to accommodate multiple, non-perpendicular pieces of card, plus enough wiggle room for real-world imperfections. Even the glue tabs need extra attention to ensure they don't end up overlapping each other. Because I don't have a large enough cutting mat, I can't cut the strips in one piece. Instead each strip is actually constructed from several shorter strips, also interlocked together. Oh, and the triangles aren't quite equilateral either so the notches need slightly different spacing depending on orientation too (thanks, windows...).
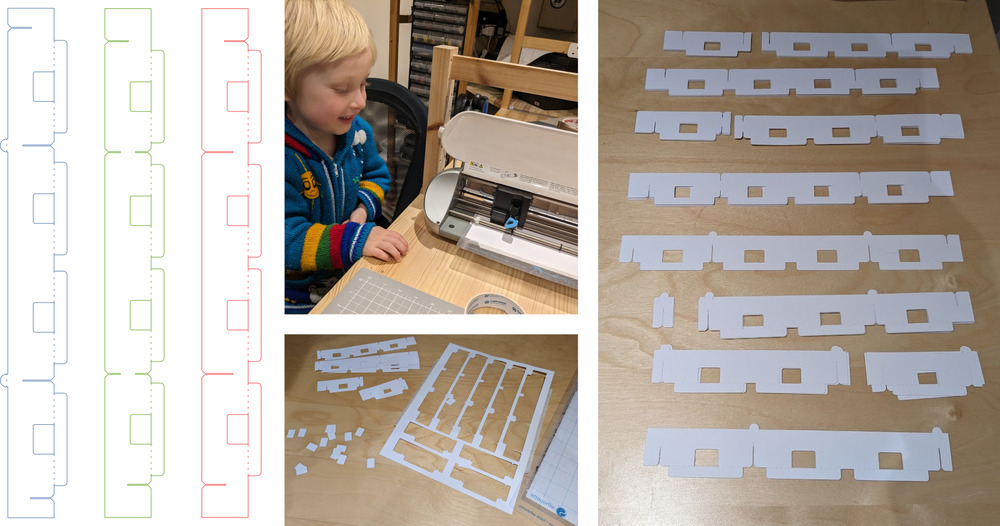
As usual, I did the 2D CAD in Inkscape rather than a 'real' CAD tool. For a one-off project like this, the speed with which you can work in Inkscape is hard to beat. My workflow generally involves dimensioning out the key forms using primitive shapes and then using Inkscape's snapping facilities to precisely construct the final cutting paths. There's something deeply satisfying about building things as an exercise in geometric construction. In particular, the newly redesigned snapping controls in Inkscape 1.3 represent a marked improvement in their usability for complex constructions.

Backing board
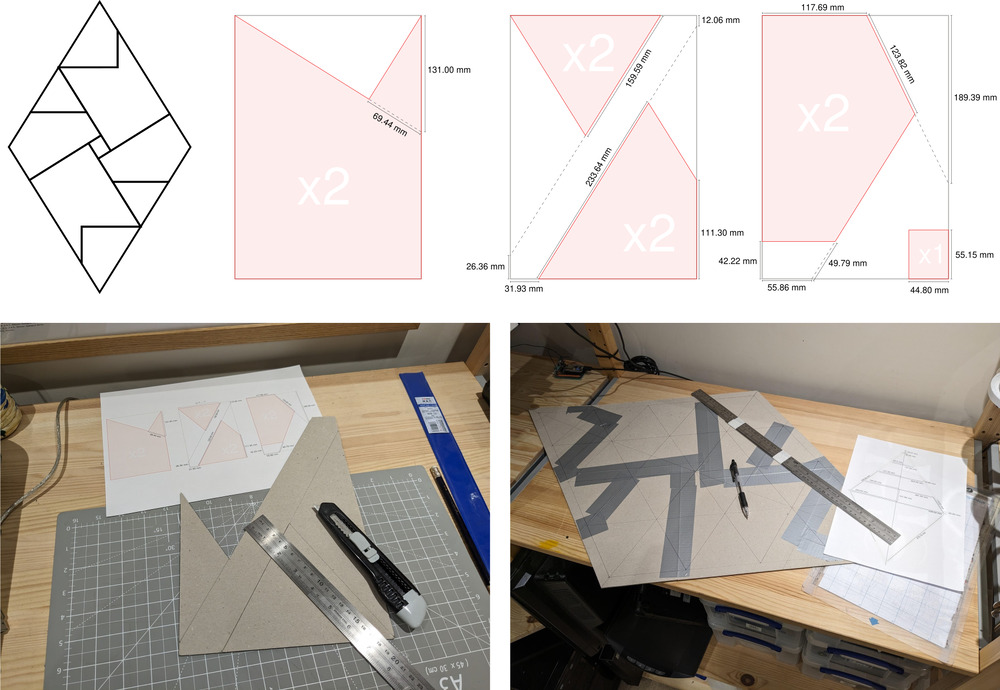
The main structural component is made from some left-over A4 sheets of 2mm thick greyboard leading to another geometric puzzle.
The challenge was to find a series of shapes, cut from A4 sheets, to make up the desired shape whilst remaining rigid. This means no straight joins along which it might fold. The solution I ended up with is illustrated below.
Too thick for the plotter, everything was cut out with a knife and ruler. This added an extra challenge to come up with a way of measuring out all construction lines so that errors tend to cancel out.
The final object looks disappointingly crude, with its irregular patchwork of duct tape, but is sturdy and correctly dimensioned.
Assembly
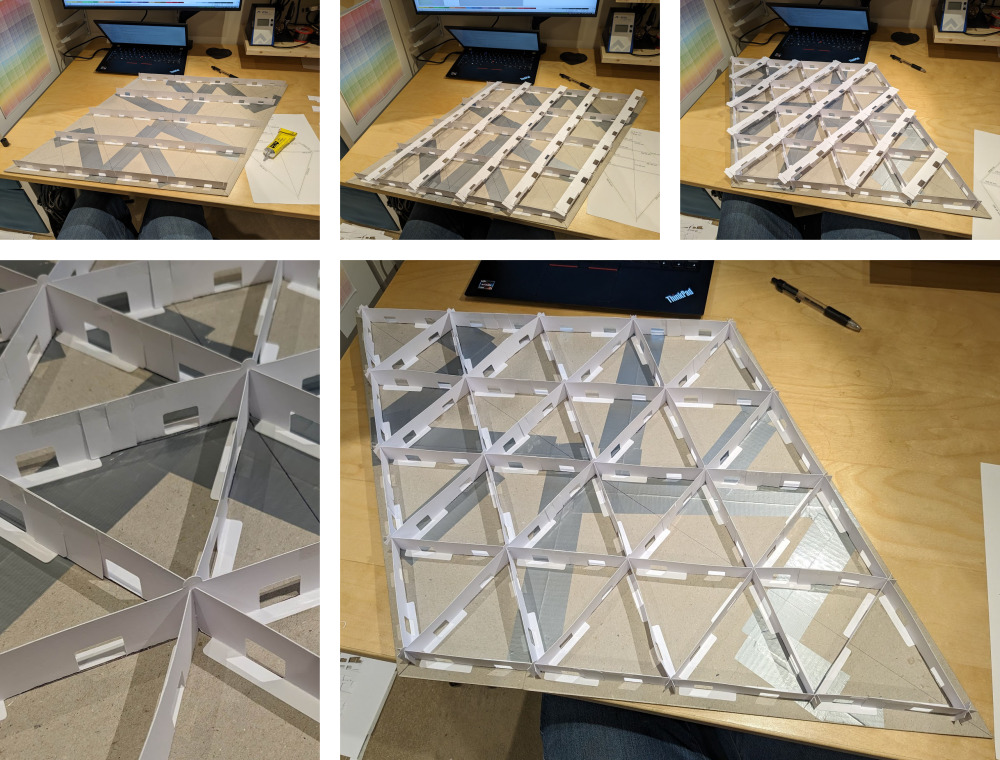
Glued onto the backing, the interlocking strips now formed a fairly sturdy structure.
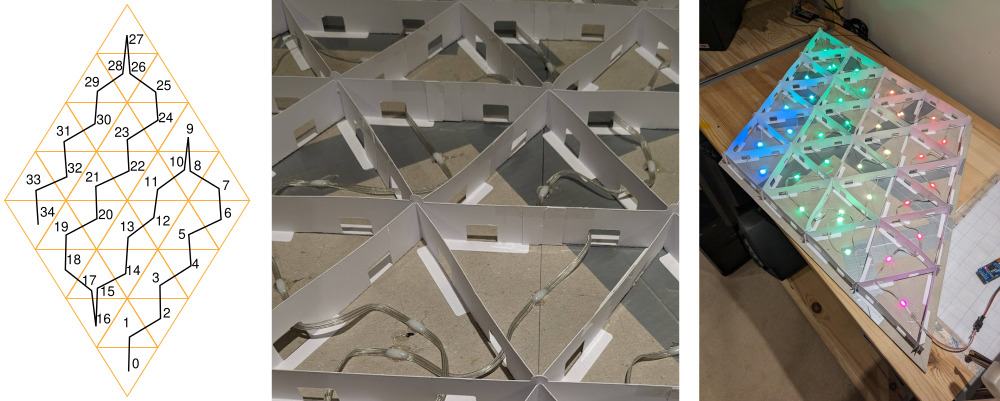
Installing the LEDs provided another fun geometric puzzle. The LEDs come evenly spaced along a wire such that consecutive LEDs must be in adjacent triangles. The challenge is to cover all 32 triangles without having too many with more than one LED.
The best I could come up with was the following pattern which uses 35 LEDs, visiting three triangles twice. In operation, only one of the two LEDs in the doubly-lit triangles is used.
To maximise brightness I used tracing paper as a diffuser. Each LED's diffuser is cut separately and overlap slightly producing a pleasing shaded border between triangles. Slots cut into the corners of the diffusers thread onto tabs on the cardboard strips. Friction turned out to be enough to keep the diffusers in place, though the tabs can be folded over just to be sure.
Hanging and finishing
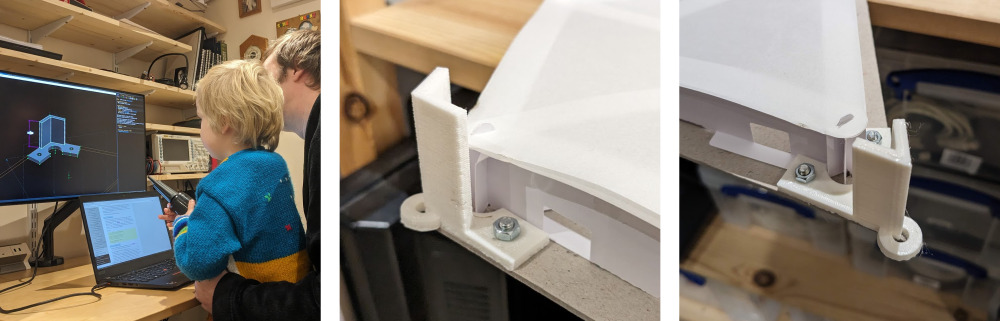
The decoration is hung from 3D printed loops on each corner. The brackets also include a protrusion which prevents the surface of the decoration touching the window if knocked. This will hopefully keep all the paper safe from any stray condensation.
Before hanging, I needed to do something about the "contents of cardboard recycling bin" aesthetic of the backing board. Some generic (non-oriented) Christmas wrapping paper did the job.
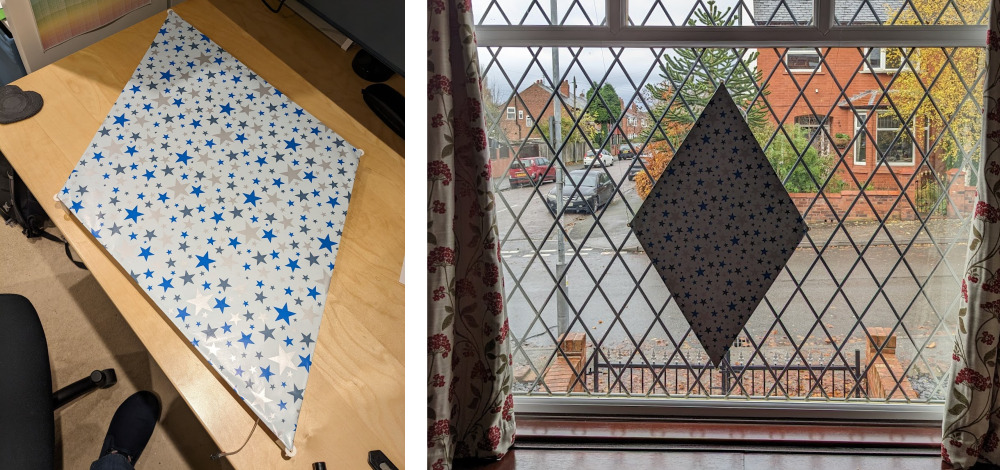
To my surprise, the wire I used to suspend the decoration proved nearly invisible. Also, because of its lack of elasticity, the result is an object which hangs eerily rigidly in free space.
Electronics and software
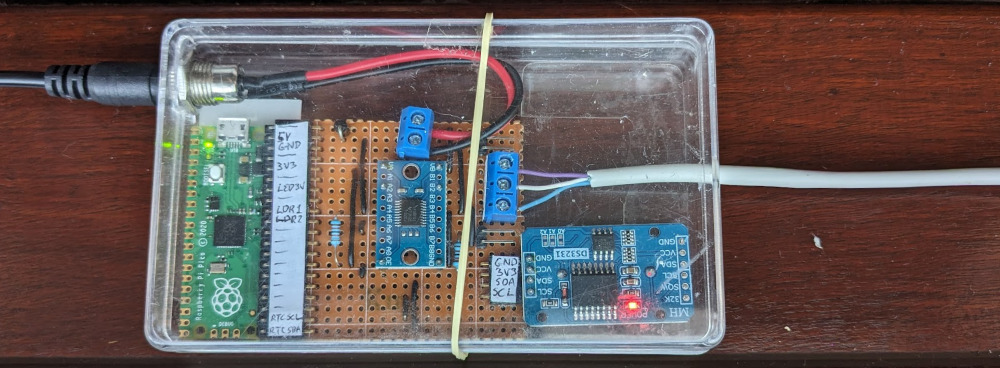
The LEDs are driven by MicroPython running on a Raspberry Pi Pico and a protoboard with a level shifter and a real time clock. The hardware (and much of the software) were borrowed from another project involving far more LEDs so driving the mere 32 in this project is not a major challenge...
I'm fairly new to both MicroPython and the Pi Pico platform and this is one of a series of projects in which I've been testing them out. So far I've been staggered by both how complete and how fast MicroPython is -- especially when using its 'viper' code generator. I'm also pretty happy with the Pico as a hobby microcontroller. It has many features, outstanding documentation and the DMA and Programmable IO (PIO) blocks are both rather fun. As an example you can do mad things like implement gamma correction in the DMA controller(!) whilst the PIO generates the LED control signals without touching the CPU.
Designs and sources
This project is very much a one-off. It would be a lot of work to, for example, adapt it to a window with slightly different geometry (a downside of using Inkscape for CAD). The electronics and software, too, are all borrowed from another project so are a bit ad-hoc. As such I've not uploaded the design files anywhere. That said, if you're mad enough and would like a copy send me an email and I'll happily share them.